I have spent the better part of four years ‘re-wilding’ my gut, my senses, my instincts and my knowledge to better serve me as I walked away from many commercial and intensively farmed sources of food. The greatest challenge I have faced is to attain a modest healthy number of calories from wild starches during the chilly colder months.
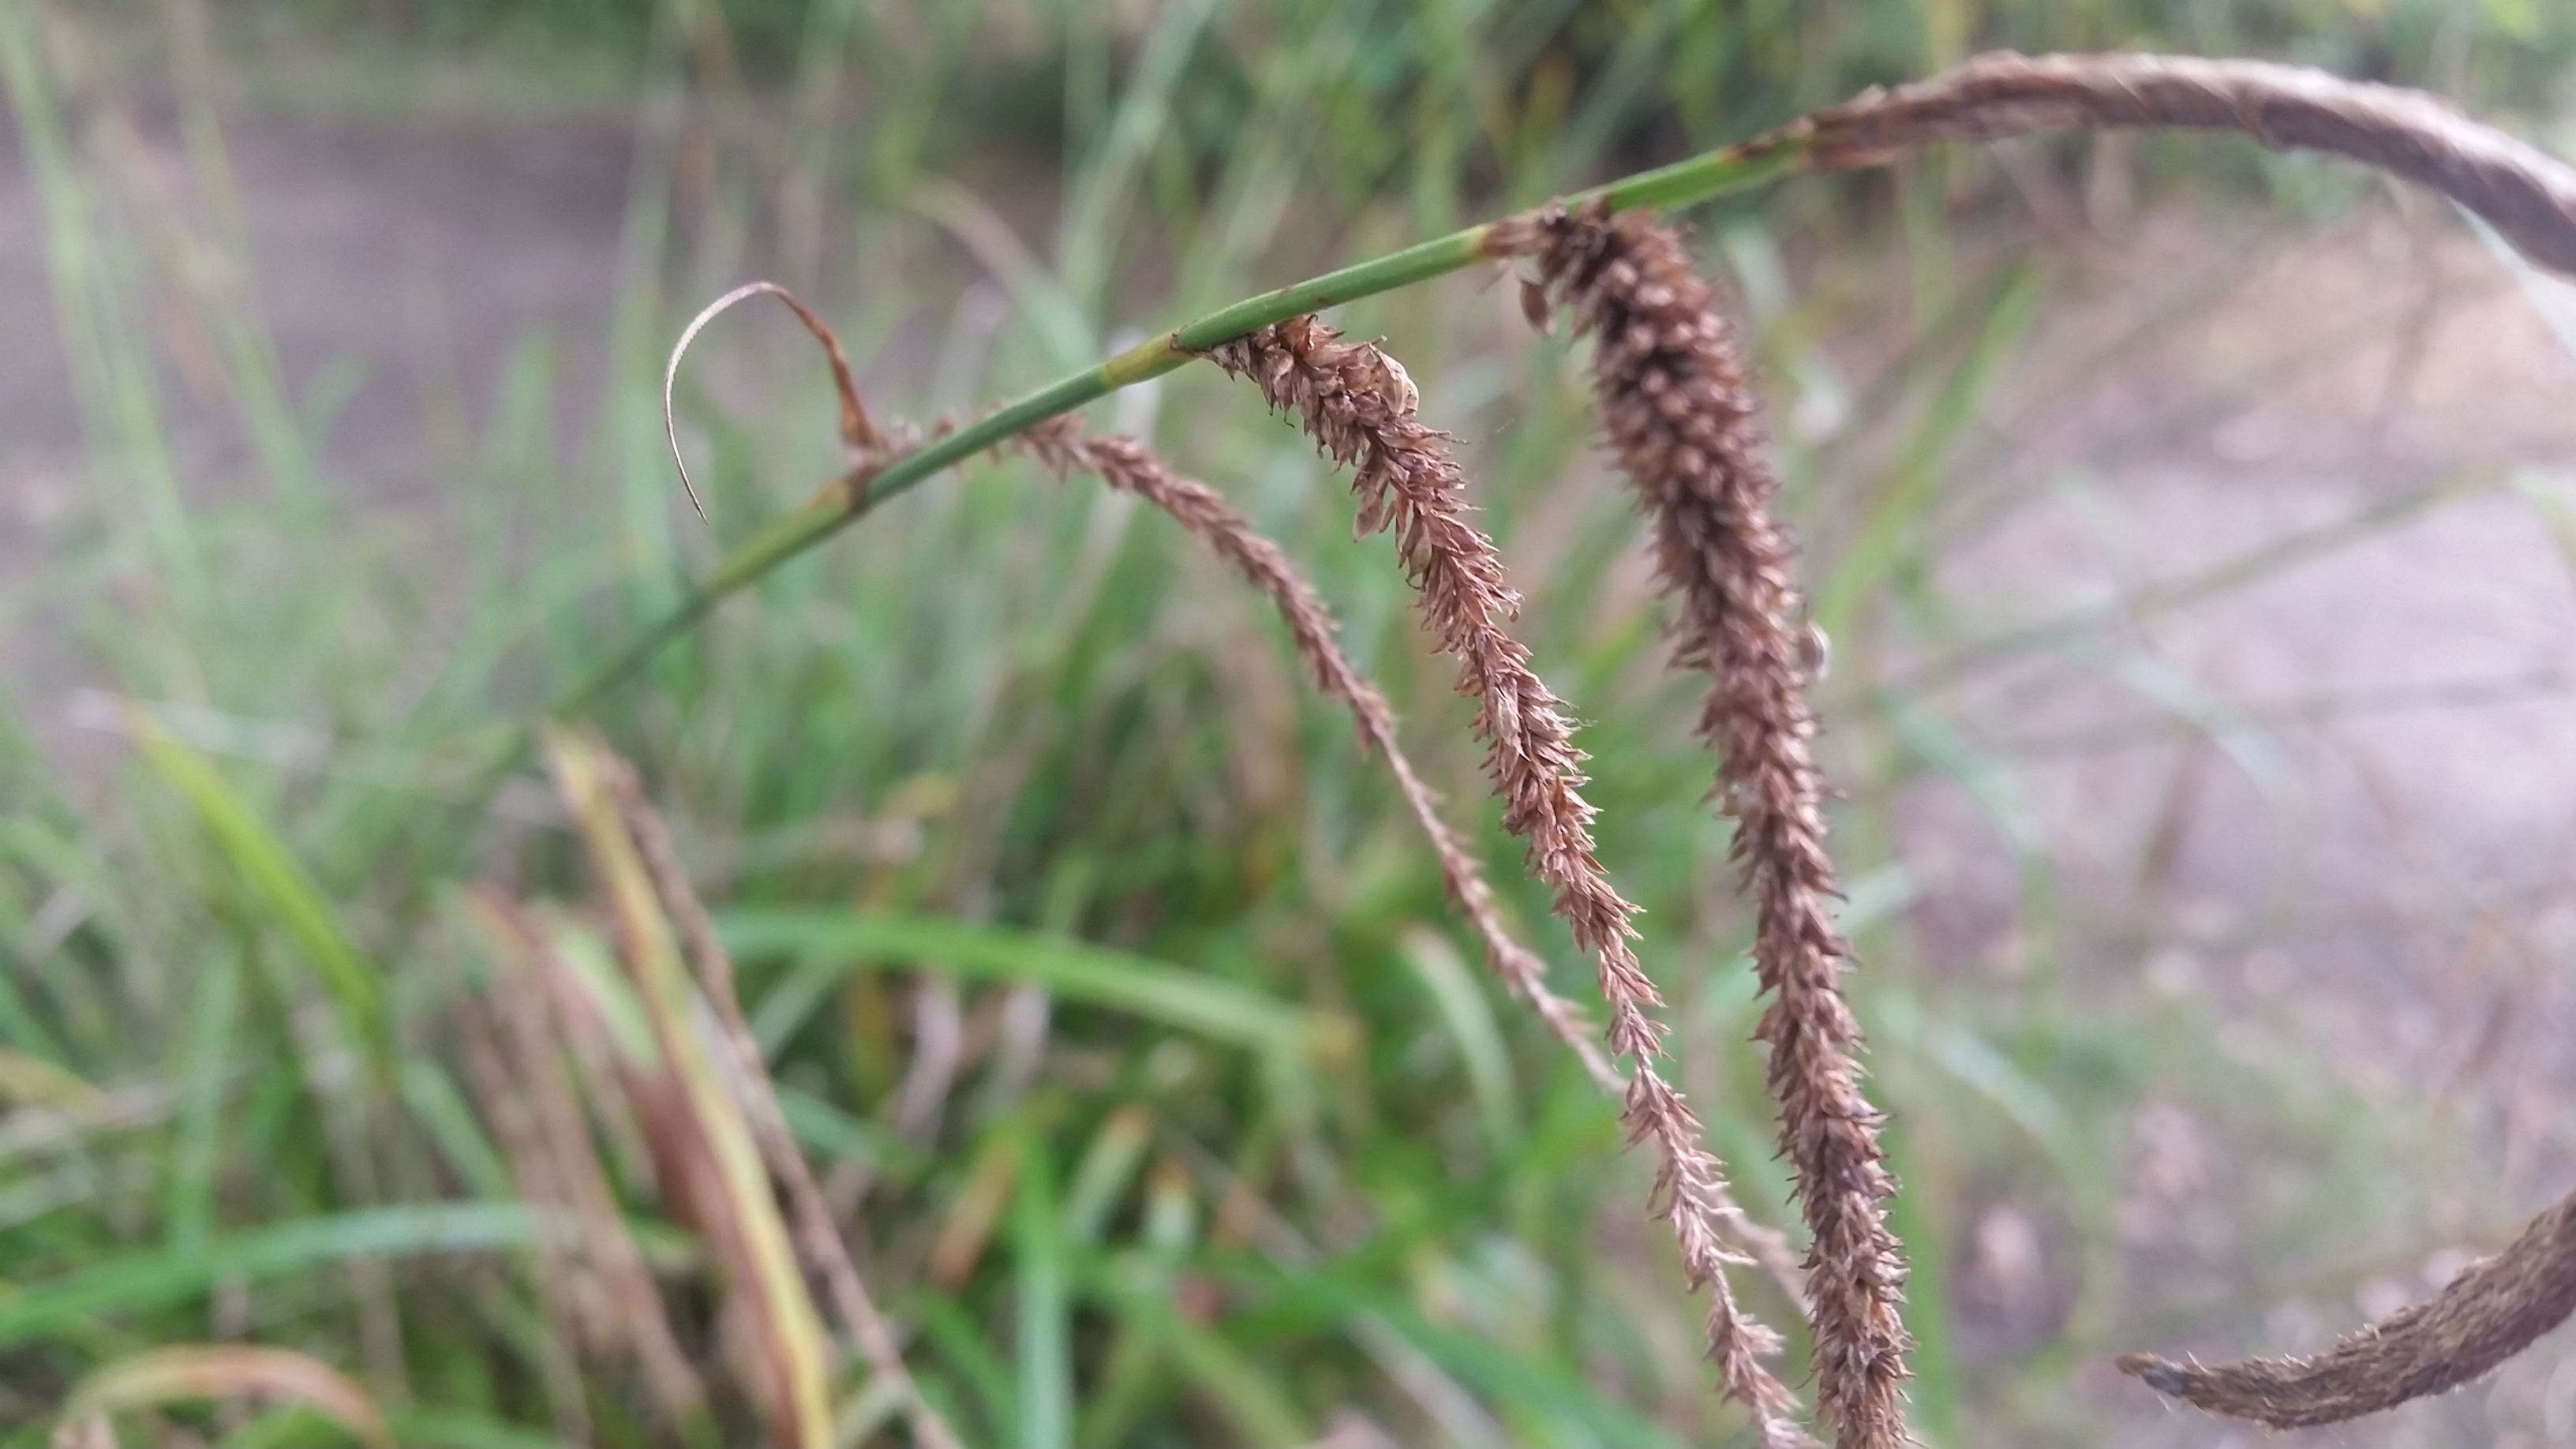
Three years ago, I watched a video of Ray Mears utilising Pendulous Sedge seeds (Carex pendula) to bake delicious unleavened bread over a fire. It’s my understanding that Pendulous Sedge was an easy to attain staple for our hunter gatherer ancestors and ever since I’ve known of its existence and during my wild food journey, I have had my heart set on attaining this wonderful wild food for one of my winter staples.
Due to the nature of how Carex pendula hangs onto its seeds for such a long period of time, it is no wonder that our ancestors could have easily harvested these in abundance as they wandered the wetlands and riversides where they could have also gathered the starchy roots of Reedmace (aka bulrushes/cattails).
This will be the first year that I have been able to source my food staples one hundred percent naturally. This also includes using YQ population flour which I get from an agro-forestry farm in Suffolk. You might even consider their methods of food production to be a type of ‘wild’ farming, always ensuring that a balance between nature and humanity is met. I would highly encourage any home bakers to source their flour from this small farm, this type of food production can help restore soils and heal our land from the intensive and destructive methods we currently use. Martin Wolfe is a pioneer in this field and the YQ flour is a blend between ancient and modern varieties to create a genetically and nutritionally diverse crop. You can buy this flour from the Small Food Bakery in Nottingham.
PENDULOUS SEDGE BREAD: Where do we start?
There is very little information out there on the big wide web in regards to using Pendulous Sedge as a food other than Ray Mears and the odd article I uncovered on harvesting and baking a mouth-watering sedge crumble!
Still, for the novice forager this might be enough to deter them from trying this abundant wild staple. Identifying Carex pendula is a simple endeavour as it looks like a grass or a rush but it isn’t any of these. There is a simple rhyme that goes: ‘Sedges have edges, rushes are round, and grasses have knees that bend to the ground.’
Pendulous sedge stems are triangular hence the ‘edges’ and usually grow around 3ft long. They arch over with large flowing bodies and later distinctive seed heads that swing like pendulums in the wind.
Unlike grass seeds that are also edible, sedge is resistant to the ergot fungus that can grow when the right conditions are met. Ergot itself is toxic and unless you know how to spot this on grass seed then sticking with Pendulous Sedge is always a safe bet.
Pendulous Sedge loves damp and wet woodland conditions and you will often find it in ancient woodland with clay or heavy soils. Living in a big city, you might find it in gardens, parks and any wasteland near a river or stream. If you don’t live near a prime location for it to grow wild there is still good news. Carex pendula is available to buy as a seed online and in garden centres so you can start your own production of this hardy plant even in the city!
HARVESTING THE SEEDS: finding the rhythm…
When I first discovered my local population of sedge it took me two hours to fill one medium sized re-sealable bag and by the end of the week I had learnt to fill a fifteen litre container in the same amount of time! – There is a knack to it and when you find your individual rhythm the results are immensely rewarding.
Pinch the seed head at its base with your thumb and index finger and cup your hand. As you pull gently up the stem the seeds will simply fall into your palm ready to decant into a bag or container. Be careful not to get too excited and harvest at speed before you know what you are doing because the firm, thin leaves can give you paper cuts. I learnt this the hard way!
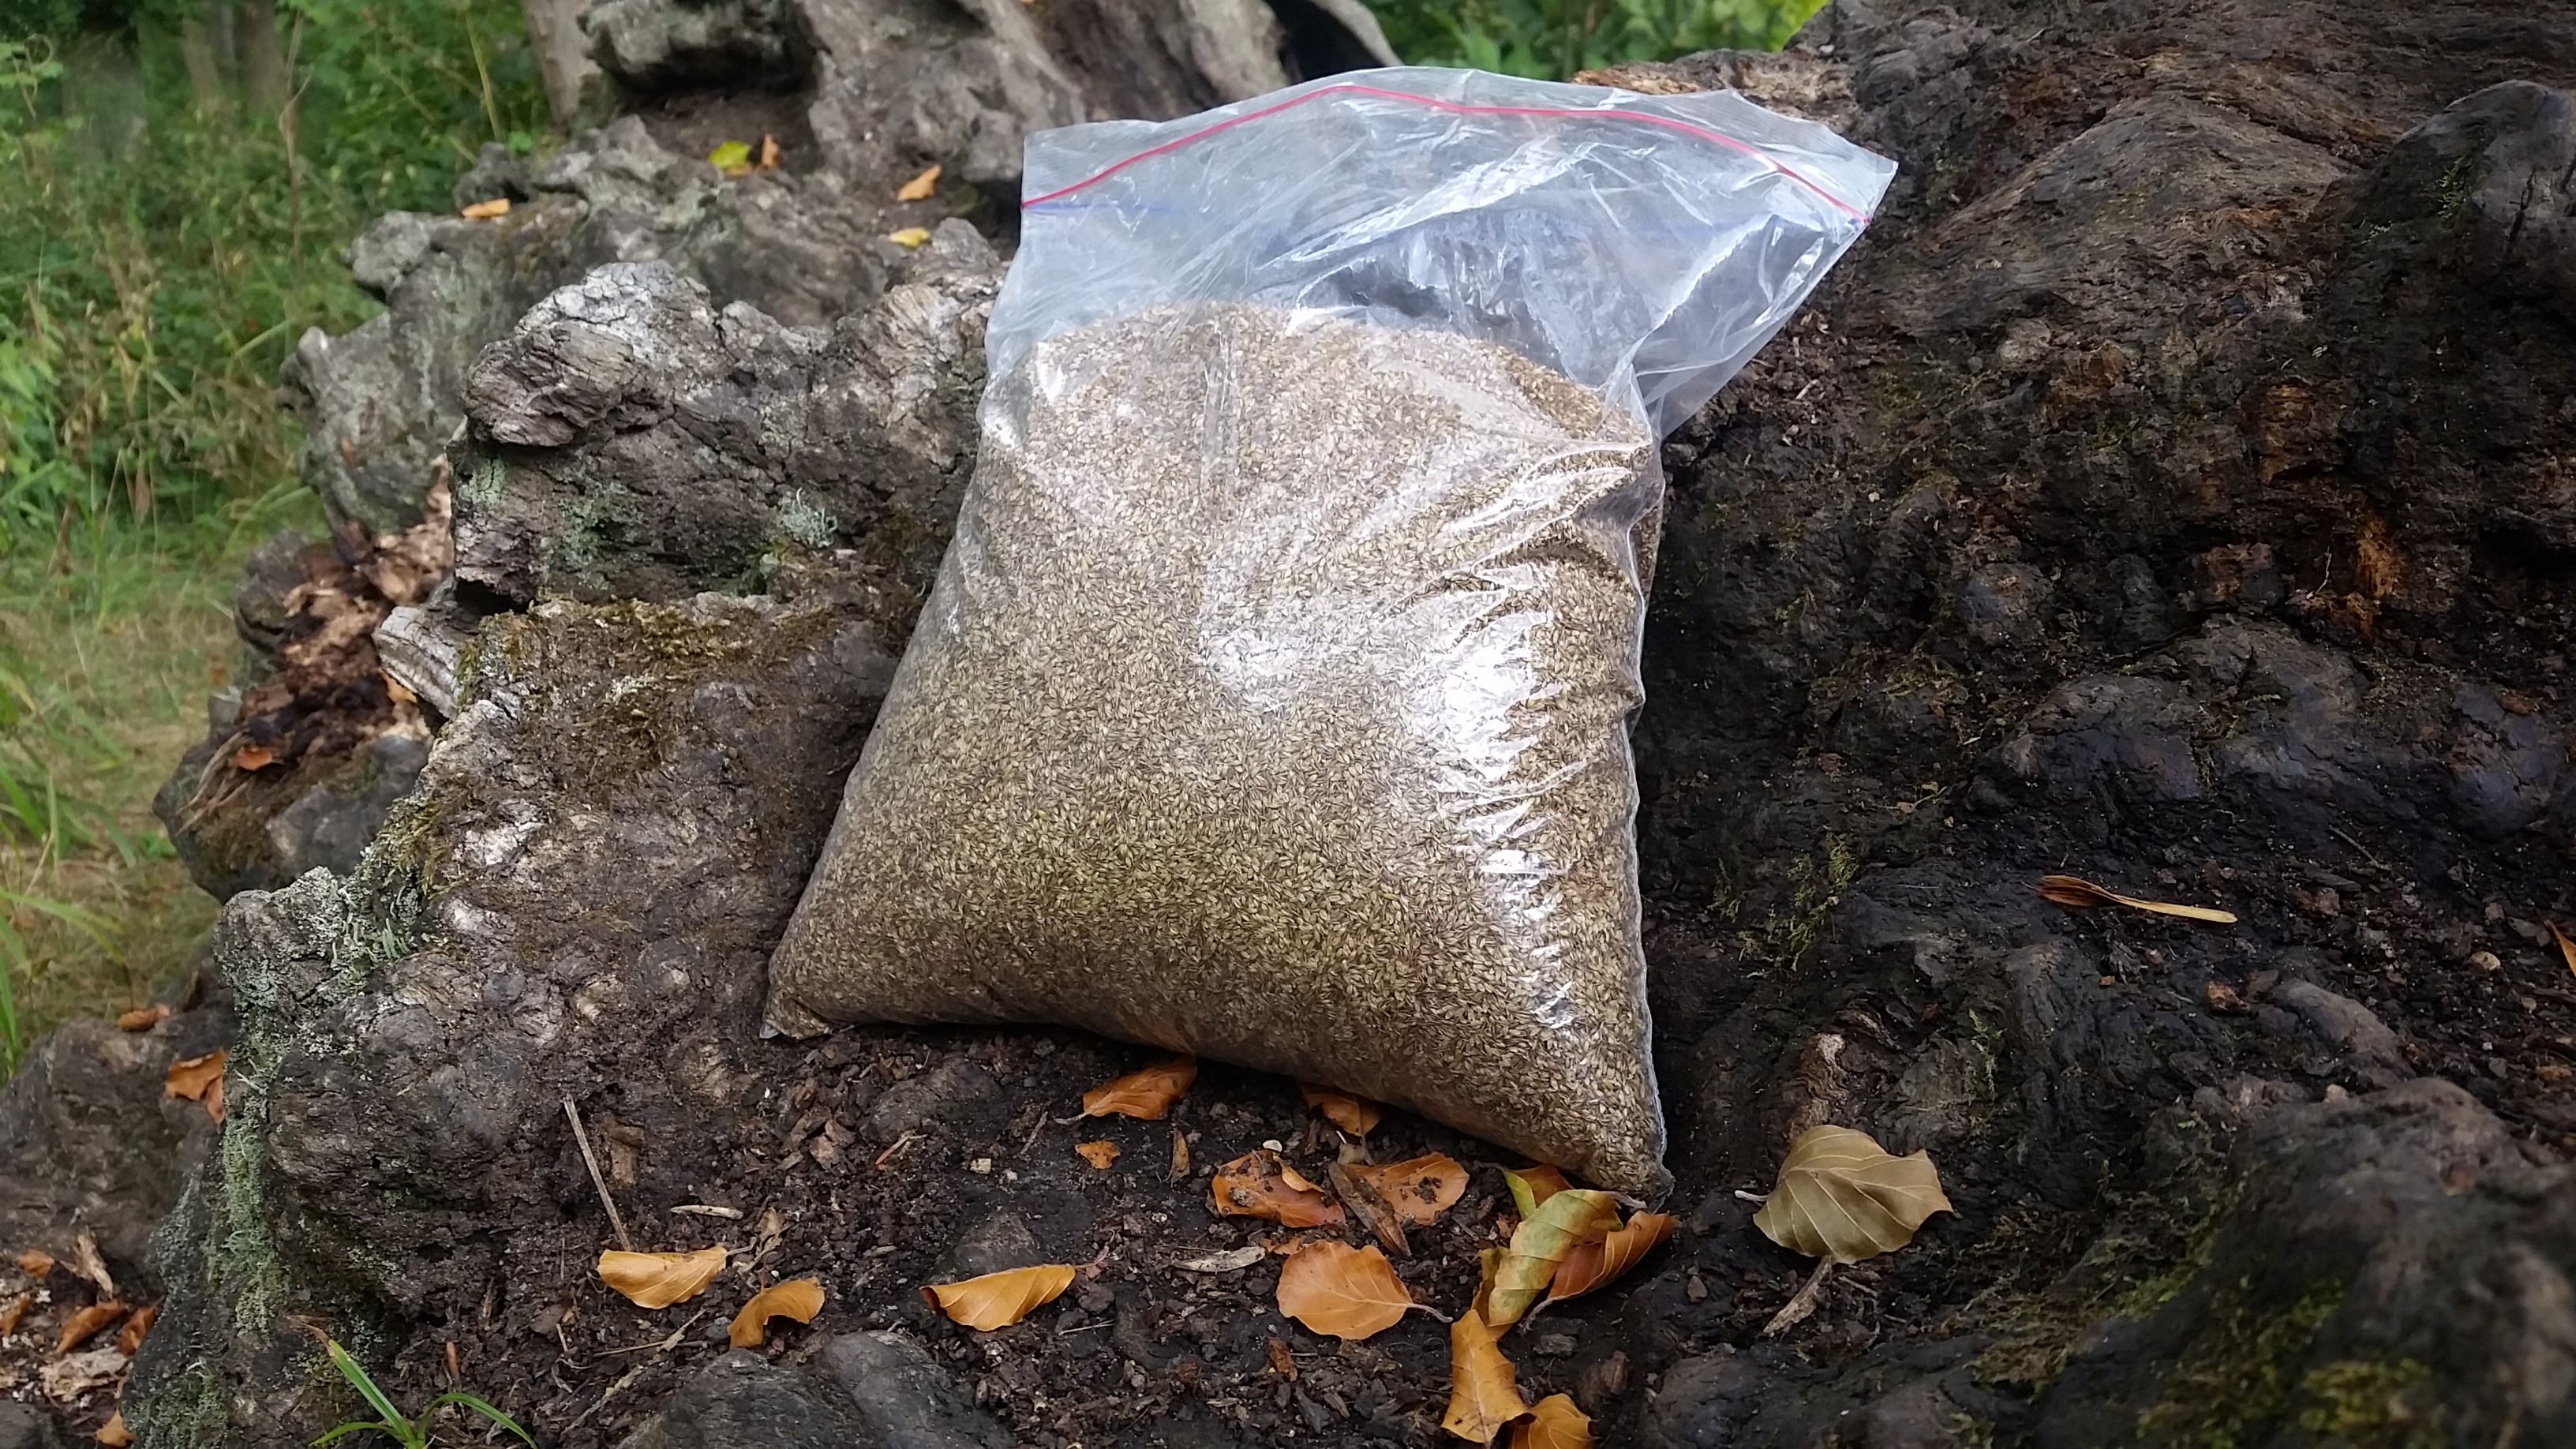
YOU HAVE YOUR SEEDS NOW WHAT?
The raw state of harvested seeds often contains a lot of chaff, spiders and other bugs. If you are like me and do not mind the extra protein skip this step, otherwise spread the seeds out thinly on a large flat surface outside so that the creepy crawlies can disperse and leave you with the seed only. This might also aid in removing the loose chaff – but make sure that you don’t lose any seeds in a sudden wind.
THRESHING and WINNOWING are the two traditional processes used to remove the hulls (husks) from the seeds and to clean the seeds from dust and other fibrous matter that can make them hard to eat if baked into a loaf. I skipped this step in the beginning and the result was just a little hard to chew.
There are many methods, but I found a quick and simple one that ensures a speedy turn-around using modern tools and appliances that you can easily find in your kitchen. Threshing can be as simple as bashing the seeds without crushing them to loosen the hulls, however I use a manual pull cord food processor that is not powerful enough to pulverize the seeds but is perfect for de-hulling them in record time. You can find one of these at Debenhams for just under £20 or online for even less!
In-between periods of threshing, I winnow the seed using two big bowls and a gentle outside breeze. Maintain this routine until you have nothing left but pretty little chestnut-brown seeds.
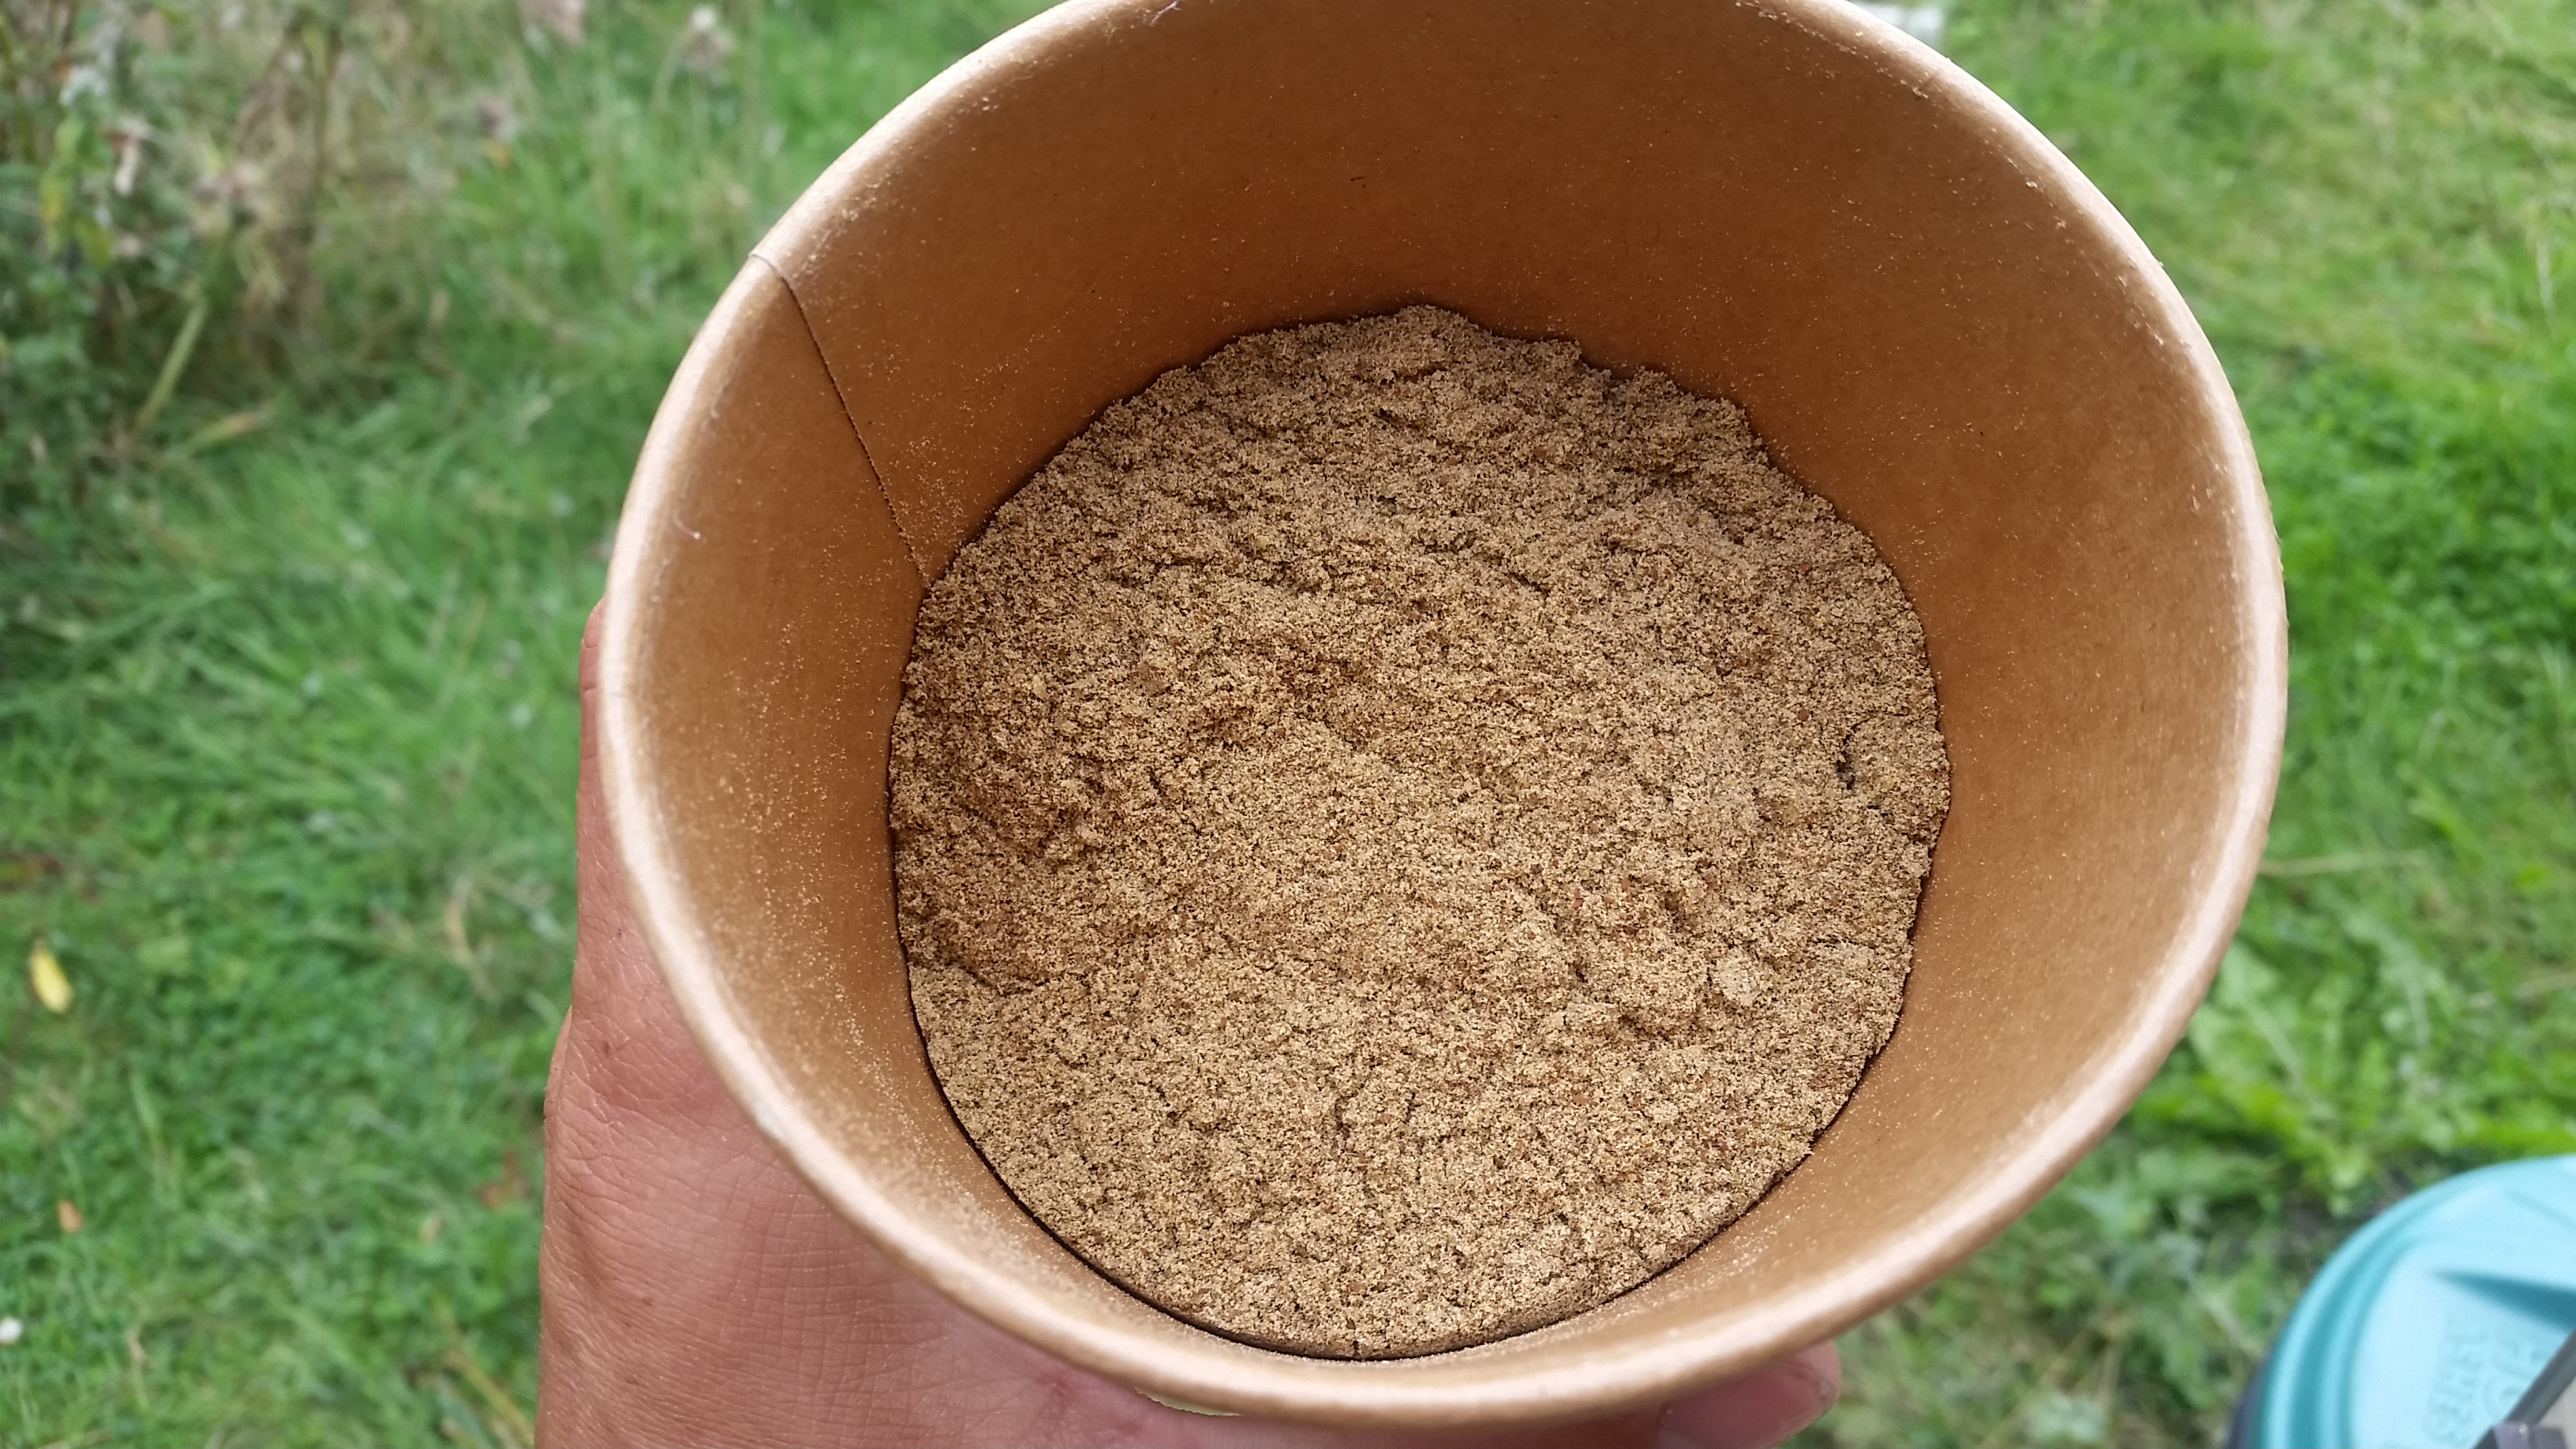
MILLING: this again is another simple process. You can do it the traditional way using grind stones or even a pestle and mortar, but what I have found does the trick in a modern kitchen is a powerful blender like a Nutri-bullet. I personally use a Touch 2 blender which is similar to a Vitamix with a whopping 2-3 HP motor. It can pulverize nearly any organic matter which is especially great for powdering seaweed!
Video: Process from harvesting to bread – https://www.youtube.com/watch?v=1AQD5wHHkCs
HERE COMES THE FUN PART: Baking the bread…
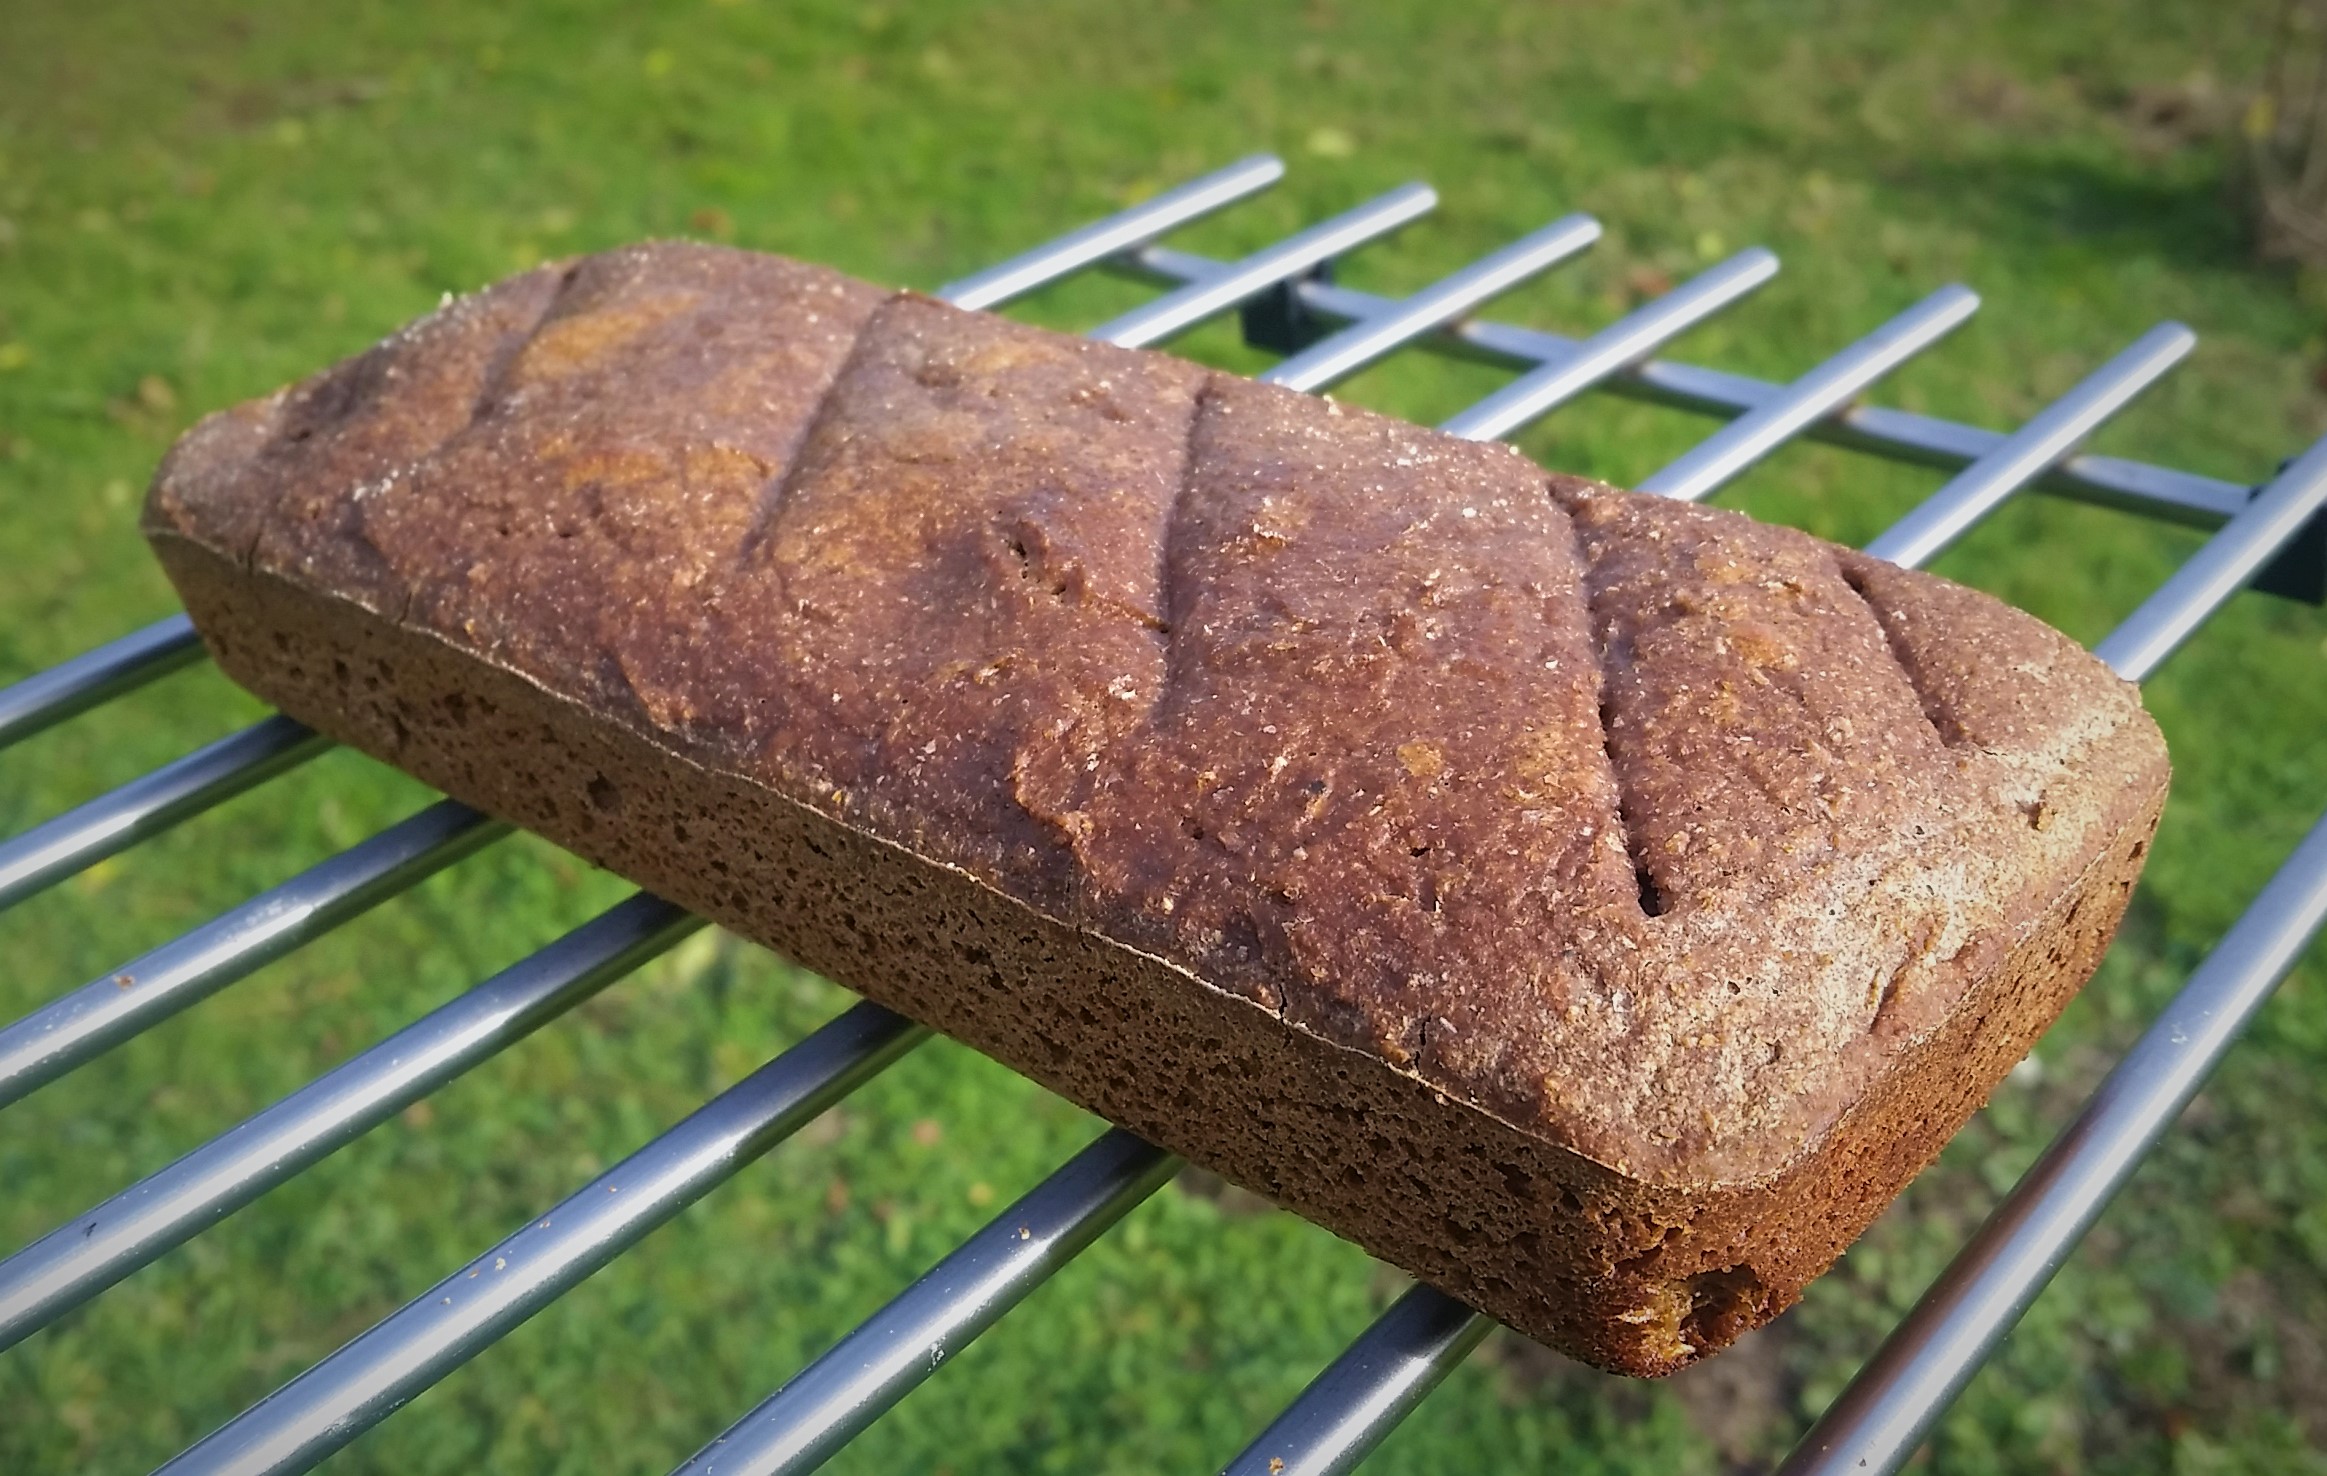
Pendulous Sedge has a dense nutty flour and as a survival food it’s great on its own or accompanied by a little honey or homemade wild fruit preserve. I’ve found the most delicious method to use this seed is a 2:1 blend with any other flour of your choice but be aware that some flours may not be suitable for culturing a sourdough starter. This recipe uses the YQ population flour that I mentioned at the beginning of this article. You can skip the first step of making sourdough and use a normal yeast, but the very nature of fermentation unlocks the nutrition in the seeds and breaks down the phytic acid which can inhibit the absorption of certain minerals.
These measurements are approximate as I do not use any tools myself other than a teacup! Scale these ratios up as much as you like, or play around with the quantities till you find your own desired mixture. Each ‘part/cup’ described in the recipe refers to one teacup.
STEP ONE: Making the Sourdough starter…
1 part YQ population flour
1 part filtered or bottled water (chlorine in tap water can inhibit the wild yeast)
Method: Stir until smooth and cover loosely with at tea towel. Leave in a warm place for a day or two until you see the bubbles and smell the ‘sour’ scent of the yeast in action.
STEP TWO: Preparing the bread…
Tip the sourdough starter into a mixing bowl and add the following:
1 cup YQ population flour
1 cup Pendulous Sedge flour
½ cup filtered or bottled water (you can increase this depending on texture of the bread
A couple of turns of salt
2 tea spoons of powdered seaweed (optional – I harvested my own seaweed during the summer)
1 table spoon of local honey (optional if you prefer a hint of sweet)
Method: Stir the ingredients thoroughly and prepare a baking dish with a little oil or butter. Tip the mixture into the bowl and cover with a tea towel in a warm spot for at least 5 hours. I usually leave mine for 15 or more hours to ensure a full fermentation however this can create a little sour kick that may not be to everyone’s taste.
STEP THREE: Baking…
Pre-heat your oven to around 180-200C and bake with a shallow dish of water in the bottom for 30 minutes. Check the bread and if it is firm, and there is still water in the dish, remove the dish and bake until the crust hardens.
Tip the loaf out of the dish and leave to cool before slicing. Serve with some butter and wild jam or preserve… ENJOY!
BE ARTISTIC: Play with your food…
Do not stop at this basic recipe. Why not decorate with other wild seeds and ingredients readily available in and around your home?
Plantain seeds are delicious and full of fibre, or find some acorns (leach them in multiple changes of water before using) and chestnuts to blend into your flour mix. Dry young nettle leaves and crush them into your dough and use their seeds too ( although in winter we may be past the prime time for harvesting these).
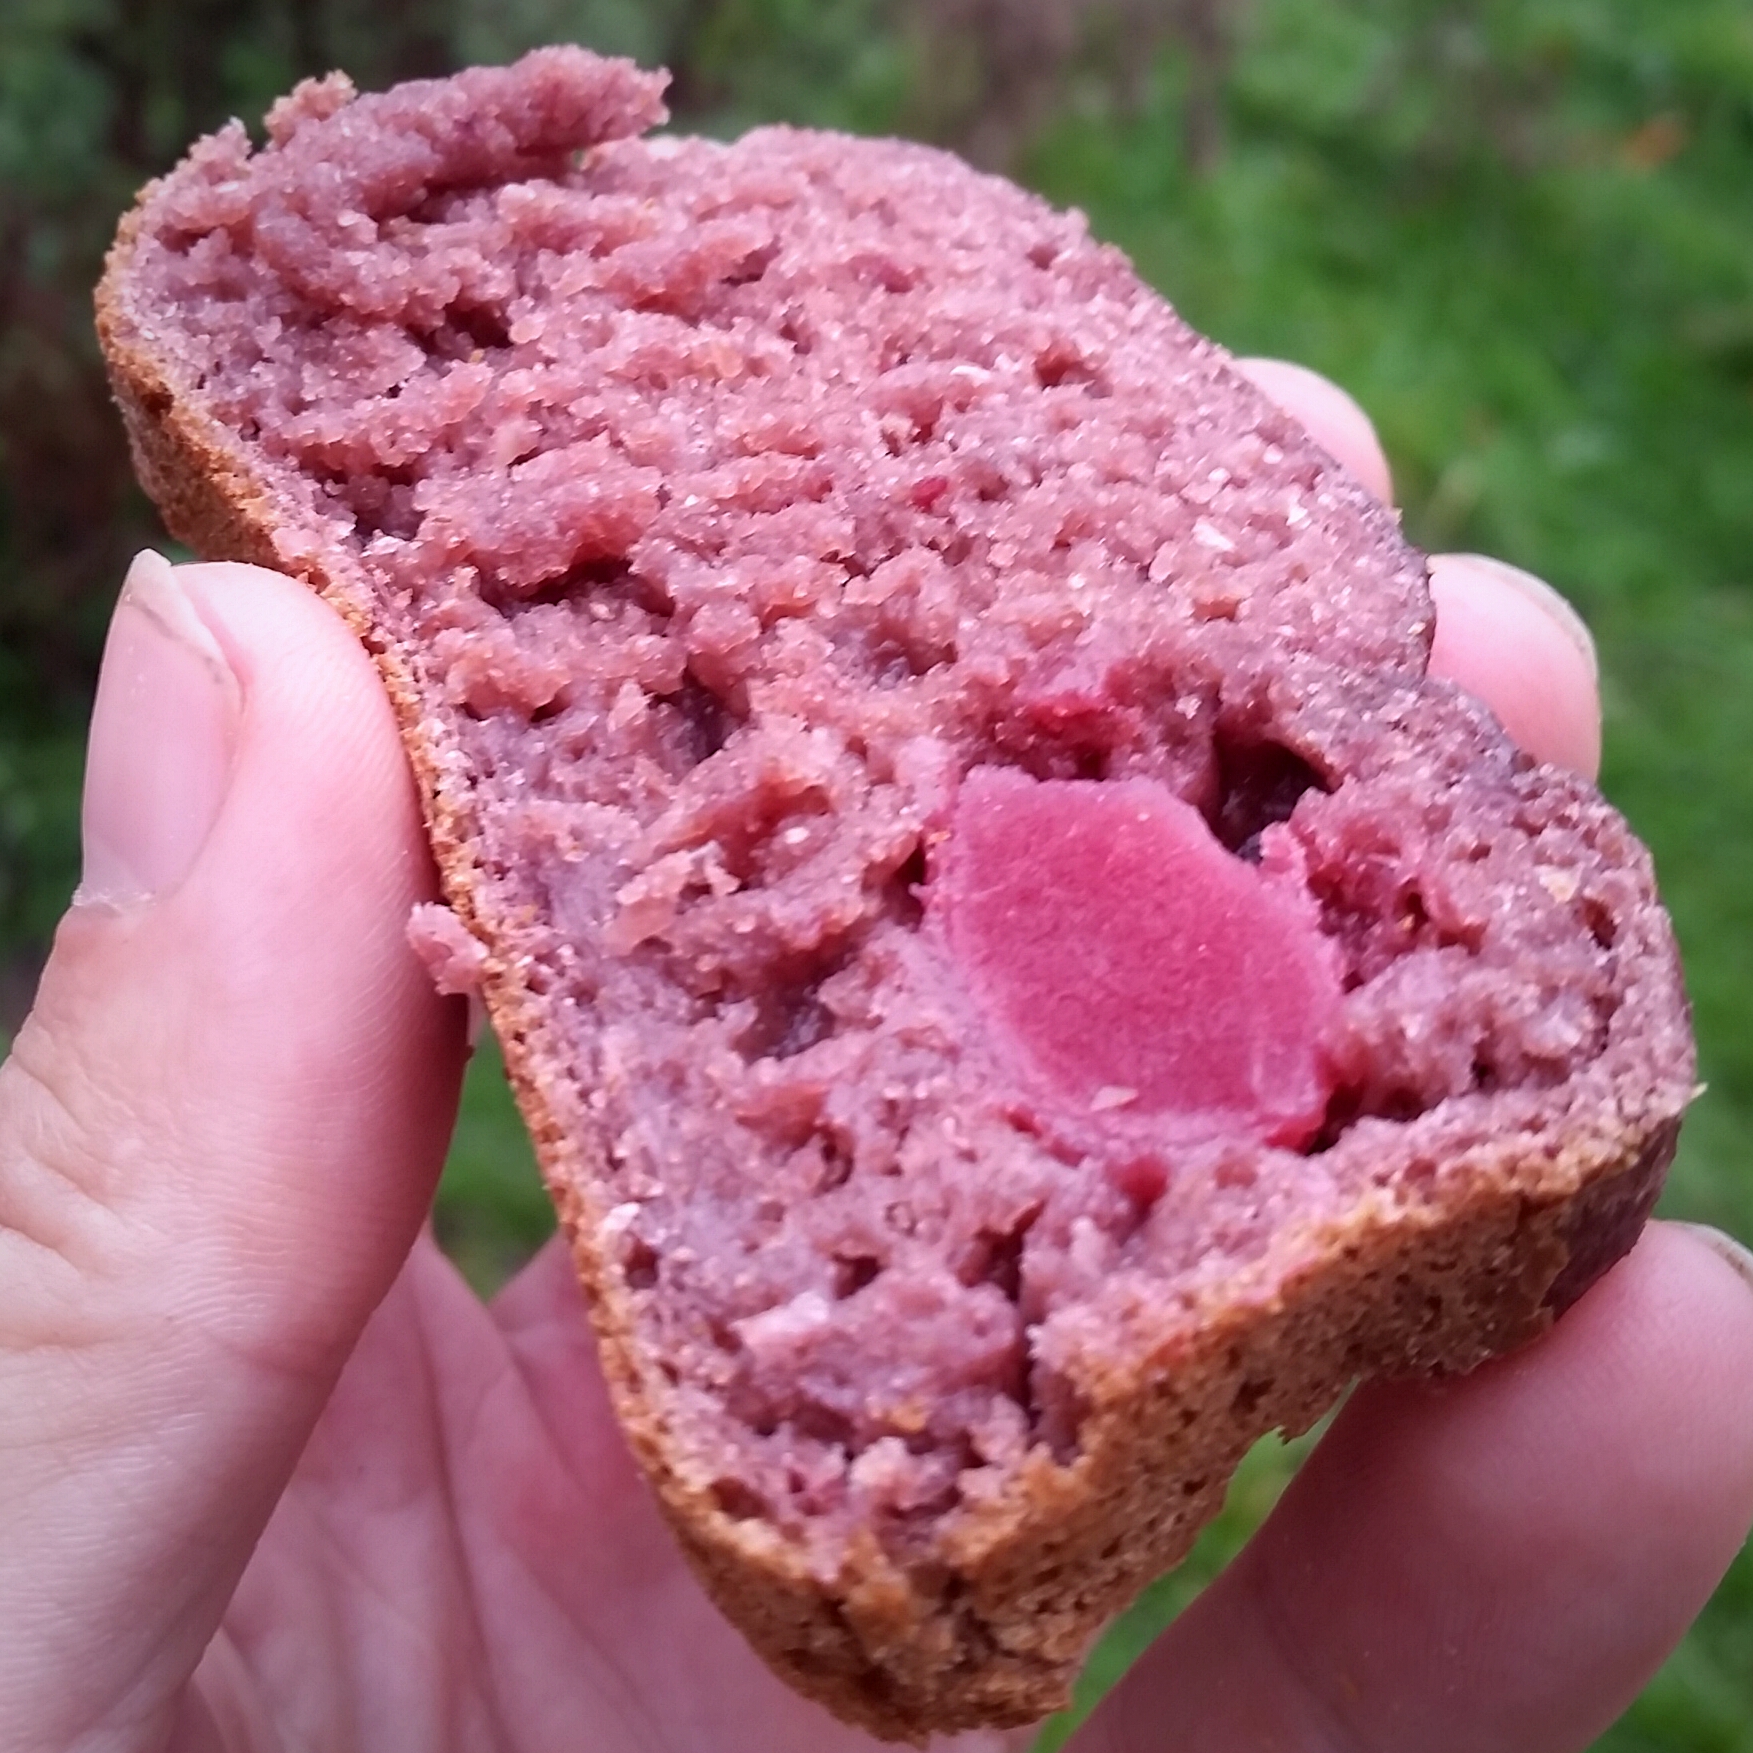
If you are 100% confident in your ID skills, why not use common hogweed seeds to spice it up? Just like I did with the wild blackberry and apple sourdough cake below!
PHOTO…..
Richard’s Bio.
Richard Mawby is a forager and a modern hunter gatherer. He has re-wilded his gut over a number of years and attains most of his nutrition from wild seasonal food alongside traceable food staples that closely mimic a true late-paleo diet.
He enjoys the outdoors, travelling, writing, inspiring, and being the change he wishes to see in the world whether it be through foraging courses, random encounters or eccentric journeys around the country on contraptions built from re-purposed junk and DIY stores (see his website for videos on the solar-powered tricycle).
Join him on his adventures through the website link below: